

Find pages ChatGPT cites
Reach the pages AI answers already trust and cite.
Choose Find Pages ChatGPT Cites to discover which pages ChatGPT mentions for questions related to your product. The outreach angle is to earn a relevant mention on those source pages.
Run a ChatGPT Sources search
- 01
Start with the ChatGPT Sources template
Choose Find Pages ChatGPT Cites, then adjust the request so it describes your niche and the pages you want to reach.
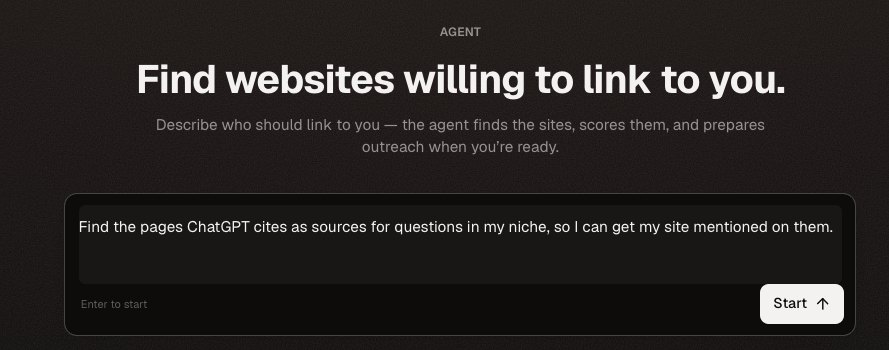
The template gives you a useful starting request that you can edit. - 02
Choose how many websites to find
Select 50, 100, or 200 websites and review the reserved credit amount. You are charged only for relevant websites; unused reserved credits are refunded.
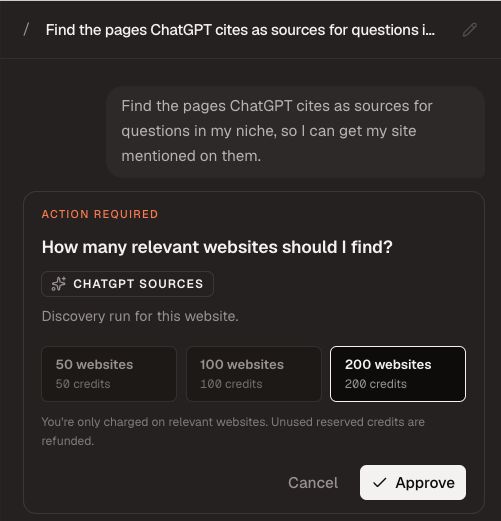
Start with 50 websites when testing a new niche or search direction. - 03
Let the agent plan the search
The agent analyzes your website and competitors before drafting questions that real buyers might ask ChatGPT.
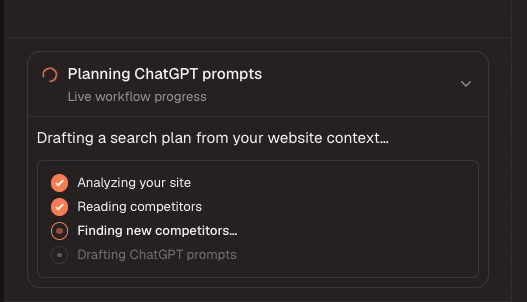
Live progress shows the website, competitor, and prompt-planning work. - 04
Review and approve the prompts
Remove weak questions, edit anything too broad, or add another prompt. Approve only when the questions match what your buyers would genuinely ask.
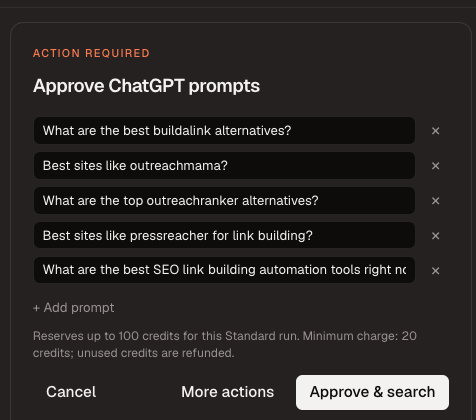
Review every prompt before approving the search and its reserved credits. - 05
Review the discovery list
The table shows each domain, cited URL, and page title. Use Export CSV in the top-right corner whenever you want a copy of the current list.
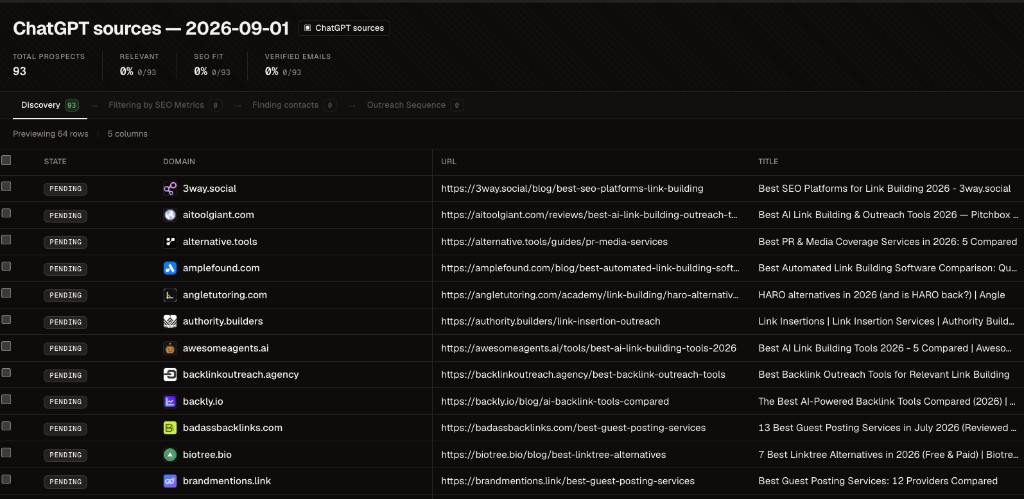
Review the discovered pages in AutoBacklinks or export the list at any stage. - 06
Check the relevance score
The Relevance score explains how closely the page and website fit your category. Open the explanation and prospect details to review the target page, website description, page type, and the question that found it.
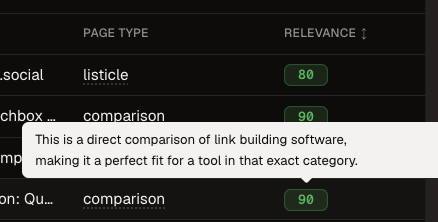
The explanation tells you why AutoBacklinks considers the prospect relevant. 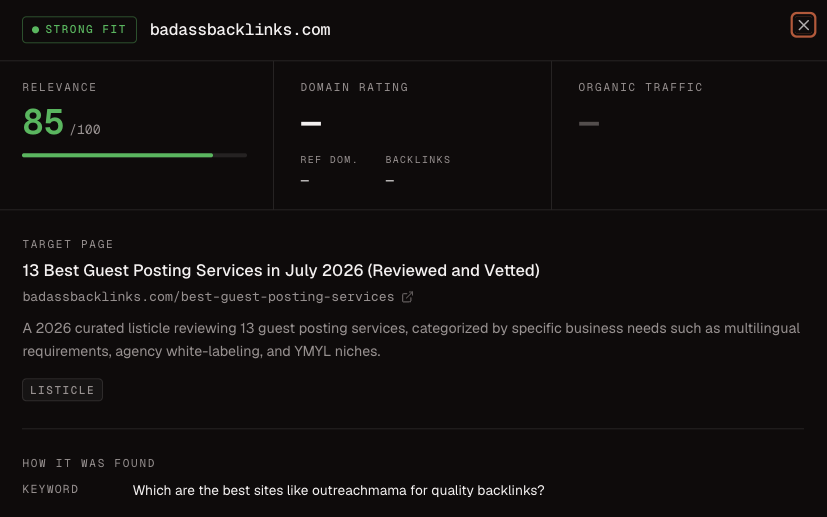
Open Details for the full evidence behind the prospect and its score. - 07
Avoid contacting the same website twice
Prospect history is shared across your account. AutoBacklinks marks and skips websites already contacted or already used in another campaign. Use More actions only when you deliberately want to include one again.

The source campaign is shown so you know why the website was skipped. - 08
Choose the next action
After discovery, continue by filtering with SEO metrics, finding more prospects, or looking up email addresses.
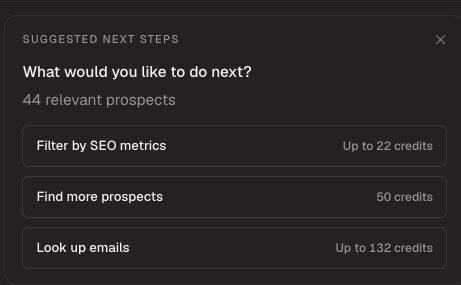
The agent shows the available next steps and estimated credit use. - 09
Filter by SEO metrics
Set the minimum Domain Rating and organic traffic. The default starting point is DR 20 and 500 monthly visits. Review the filtered table or export it before continuing.
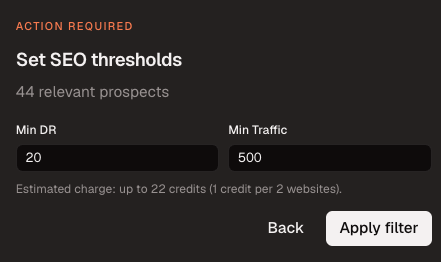
Apply thresholds that balance quality with the number of available prospects. 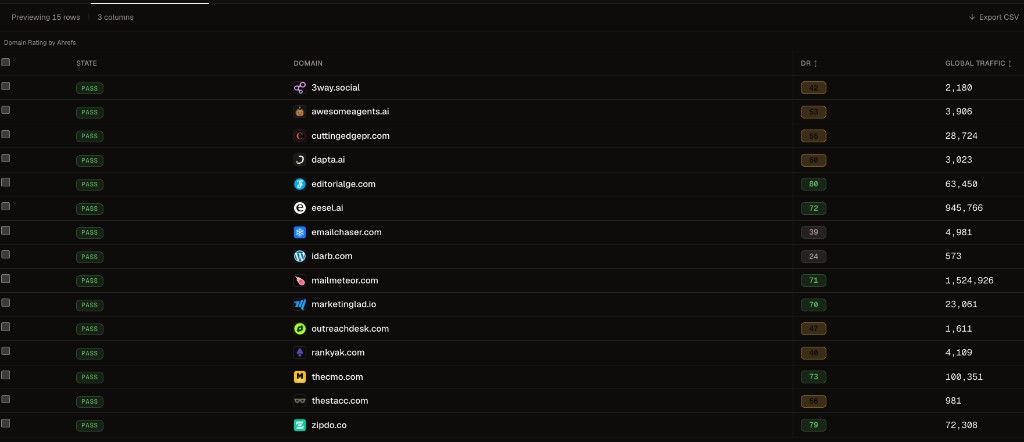
Passing prospects show their measured Domain Rating and organic traffic. - 10
Find verified contacts
Approve email lookup for the qualified prospects. You pay only for verified addresses. Review names, roles, and verification status, then export the contact list or continue to outreach.
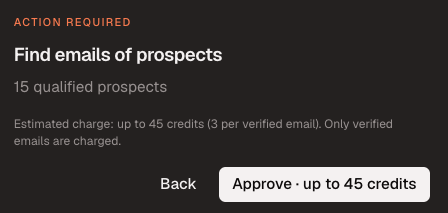
The approval card shows the maximum credit charge before lookup begins. 
Check the verified contacts and disqualify unsuitable people before outreach. - 11
Start the outreach setup
After filtering prospects and finding verified contacts, choose Add prospects to a campaign. This begins campaign setup; it does not send an email.
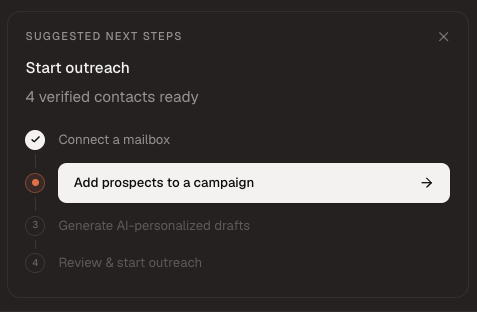
Campaign enrollment comes before draft generation and final outreach approval. - 12
Use an existing campaign or create a new one
Choose an existing campaign when its goal and outreach approach match these prospects. Otherwise select Create a new campaign, choose the campaign type, and optionally give it a recognizable name.
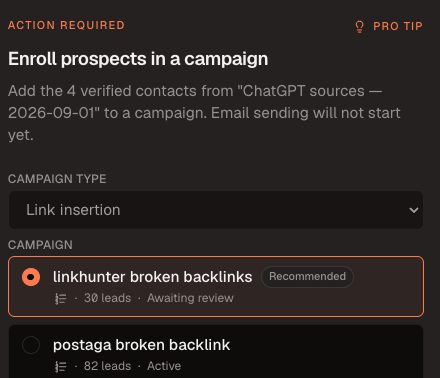
Select a suitable existing campaign or choose Create a new campaign. 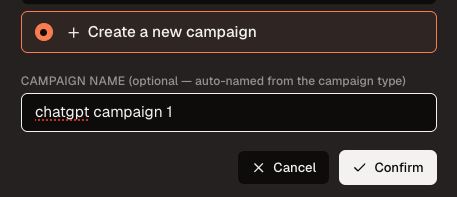
A new campaign can be named manually or named automatically from its type. - 13
Confirm the sending mailbox
Select the mailbox that should send the outreach. Connect another mailbox here if the correct address is not available.
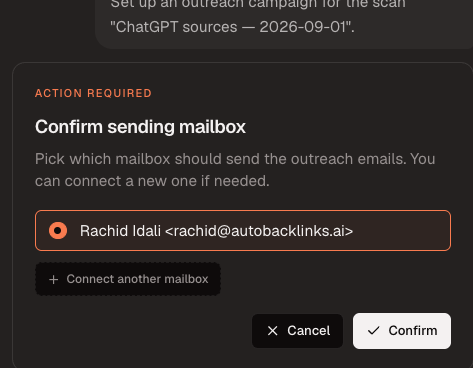
Confirm the sender before AutoBacklinks prepares the campaign. - 14
Choose your outreach approach
Write your own instructions or start from Custom approach, Paid placement, Backlink exchange, Free access, or Affiliate offer. Every template is editable, so add the exact offer, links, names, tone, and call to action the drafts should use. For example, choose Affiliate offer and add:
Offer a 30% recurring commission for every referred customer.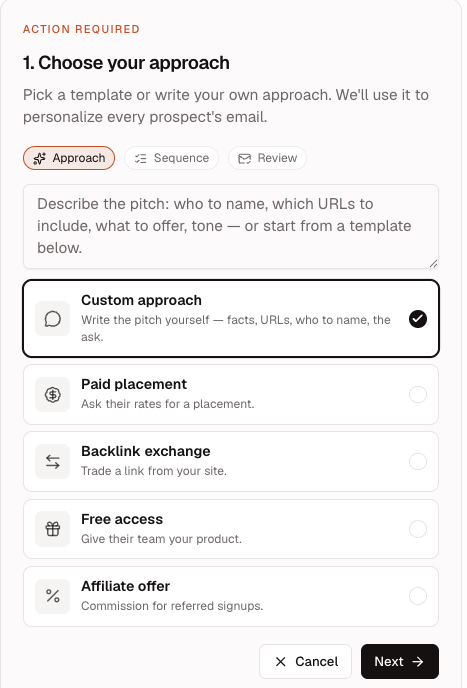
Choose a template or write your own approach, then edit the instructions with the details every draft should follow. - 15
Choose your email sequence
Choose 1, 2, or 3 emails and set the follow-up delay in days. The sequence applies to every selected prospect. A practical starting point is one initial email and one follow-up three days later.
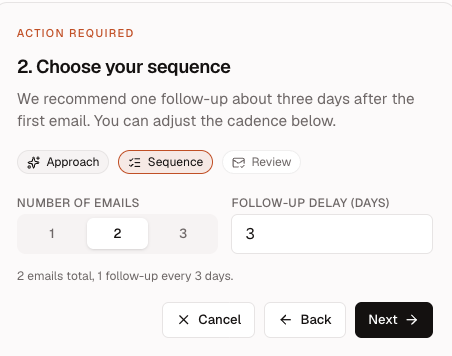
Set the number of emails and the delay before each follow-up. - 16
Review and generate the drafts
Review the approach, sequence, selected prospect count, and estimated credit use. The AI Agent generates drafts only for qualified prospects that have a verified, valid email address. Choose Generate emails when the summary is correct.
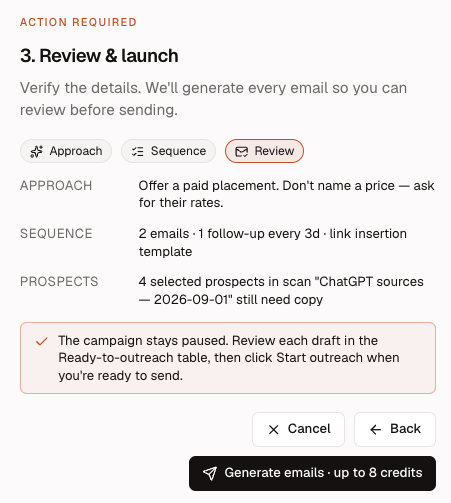
Confirm the shared instructions and eligible prospect count before generating emails. - 17
Review every generated draft
Open the Outreach Sequence table to check which prospects have ready drafts. Select a draft to read its subject, message, and follow-up before approving outreach. Exclude unsuitable prospects or revise the campaign instructions when the copy needs a different direction.
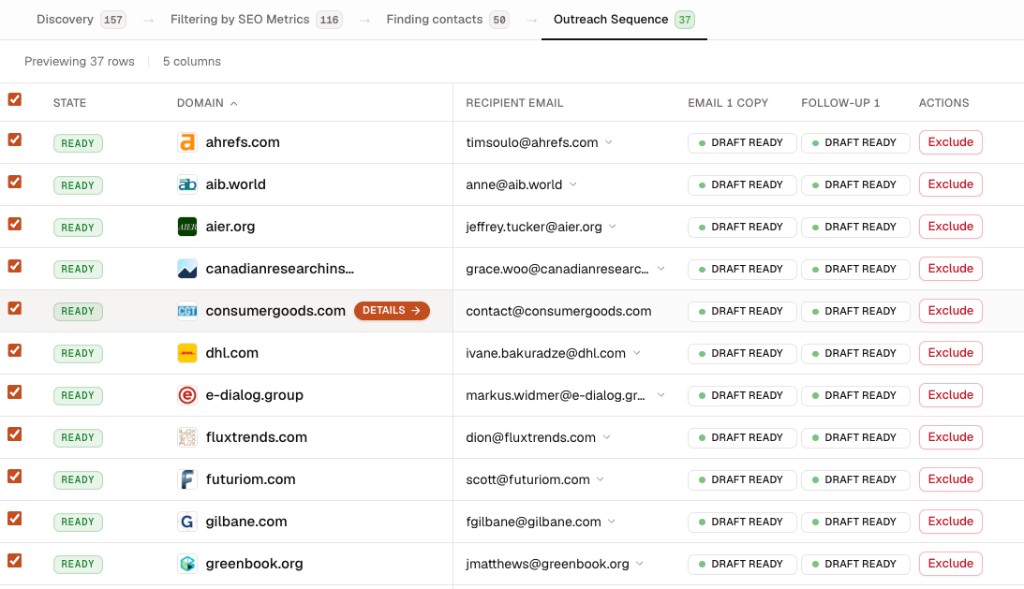
The Outreach Sequence table shows draft readiness for every eligible prospect. 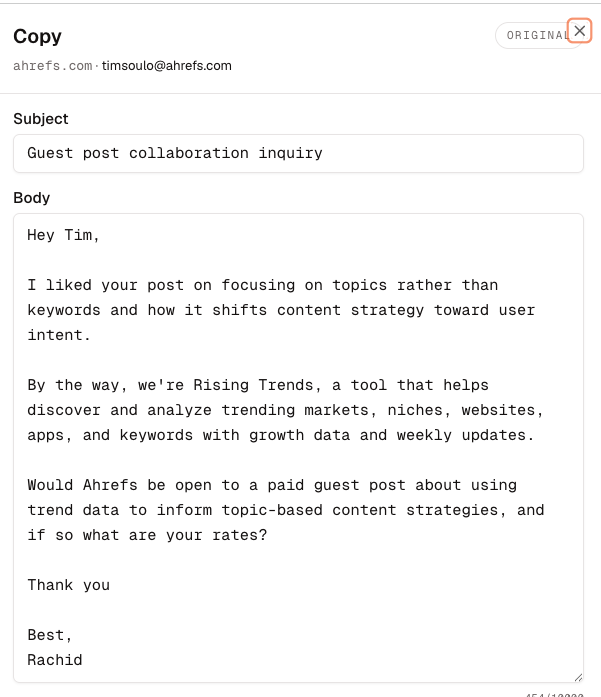
Open each draft to verify the recipient, subject, personalization, offer, and call to action.
How it works
- AutoBacklinks prepares questions your buyers might ask ChatGPT
- ChatGPT answers are checked for cited pages
- Relevant pages become prospects
- Drafts explain that ChatGPT cites the page and suggest adding your product where it genuinely fits
Use this when
- Your buyers use AI tools to research products or services
- You want mentions on pages already influencing AI answers
- Your website has a clear category and useful differentiators