

Find directory opportunities
Find directories where your business could genuinely be listed.
Choose Find Niche Directories to find relevant directories and the most likely way to submit or claim a listing.
Find and qualify directory opportunities
- 01
Start with the Directories template
Choose Find Niche Directories. The request asks for niche, local, and reputable general directories where your website could plausibly be listed. Edit it first if you want to specify a location, industry, or type of listing.
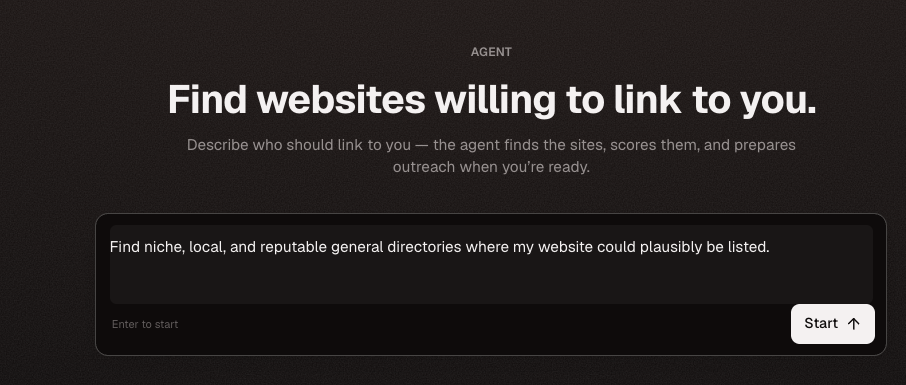
The template starts a guided search for realistic directory listings. - 02
Choose how many directories to find
Select 50, 100, or 200 websites and approve the discovery run. Credits are reserved for the chosen limit, but you are charged only for relevant directories found; unused reserved credits are refunded.
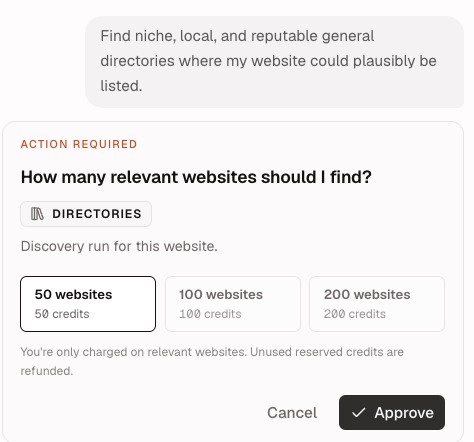
A 50-directory run is a practical starting point for a focused niche or location. - 03
Review the search keywords
The AI Agent suggests directory searches based on your business category. Add, edit, or remove terms before approving the search. Include your niche, location, or business type when those details determine listing eligibility.
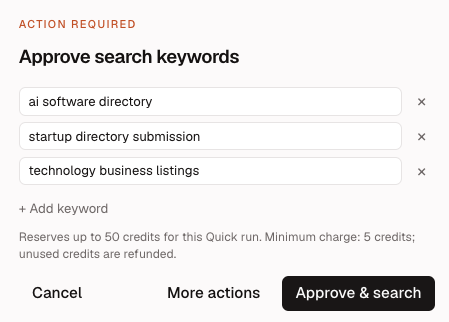
Use specific directory and submission terms to keep the results relevant. - 04
Review the discovered directories
The Discovery table shows each domain, listing URL, niche, relevance score, and expected listing cost. Export the list at any time, open a directory for more detail, or disqualify options that are inactive, unsuitable, or too broad.
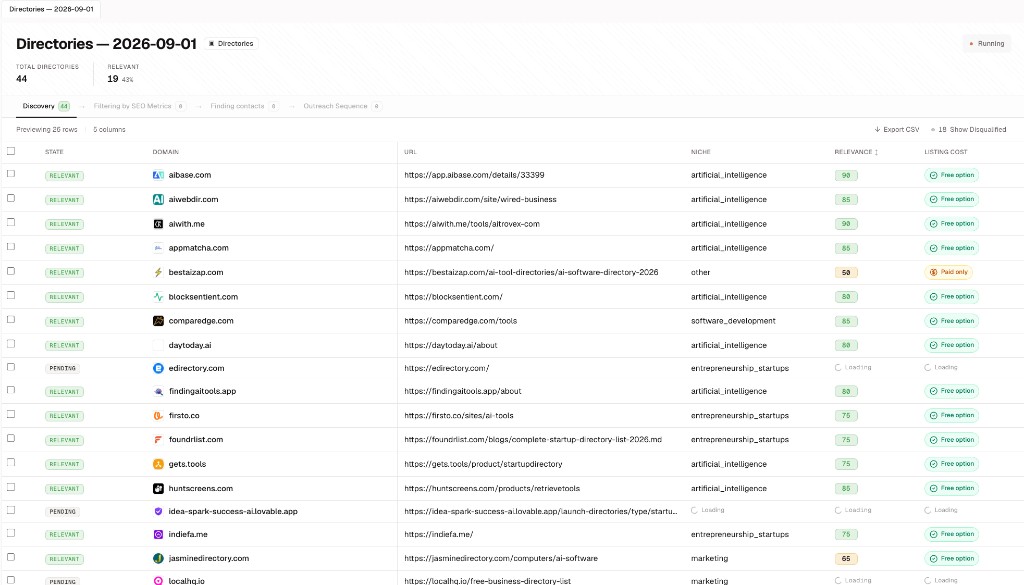
Compare relevance and listing cost before deciding which directories deserve more work. - 05
Understand relevance and listing cost
AI checks whether the directory’s audience and category fit your website. The relevance score summarizes that match. The listing cost indicates whether a free submission appears available or the listing is paid only. Confirm the final terms on the directory before submitting.
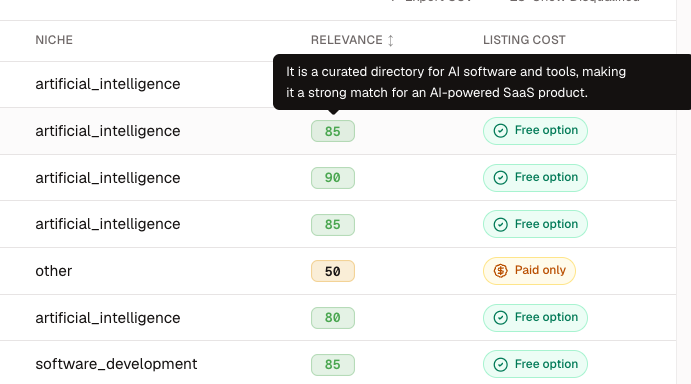
A strong match and a free option can help you prioritize the easiest worthwhile listings. - 06
Choose the next action
After discovery, you can find more directories, filter the list by SEO metrics, find contacts for listings that require outreach, or export the current list for manual submission.
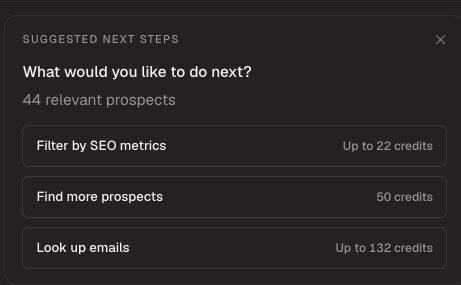
Continue with the action that matches how each directory accepts listings. - 07
Filter by SEO metrics
Set minimum Domain Rating and organic traffic requirements when authority matters to your campaign. Avoid using thresholds so high that they exclude useful specialist or local directories.
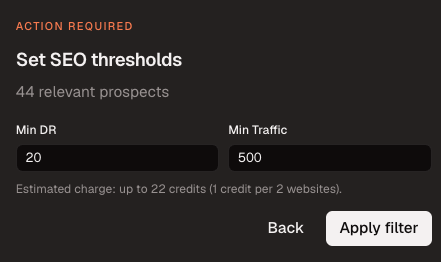
Balance authority requirements with the value of highly relevant niche directories. 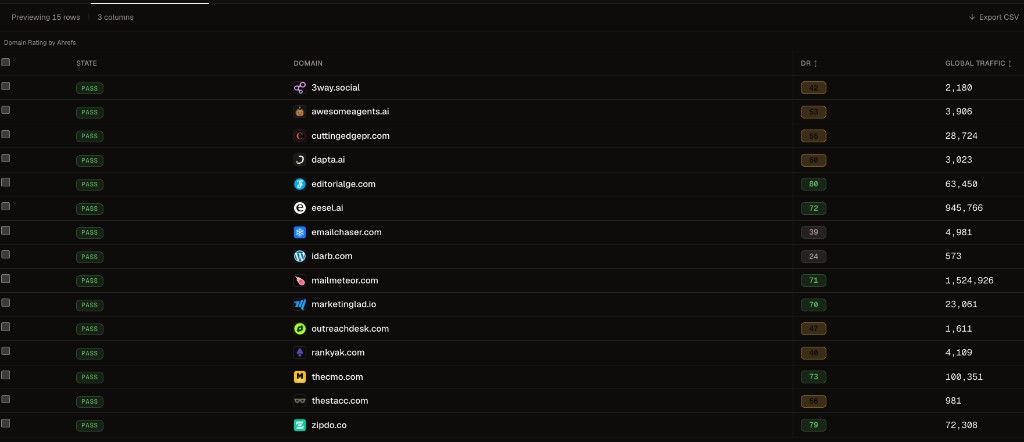
Review the measured authority and traffic before continuing. - 08
Find contacts when outreach is required
Some directories have a direct submission form and do not need email outreach. For directories that require a conversation, approve contact lookup and review the verified addresses before continuing.
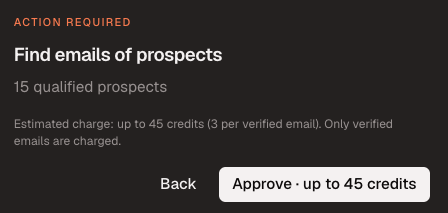
Use contact lookup only for listings that cannot be submitted directly. 
Check that each contact is appropriate for partnerships or directory submissions. - 09
Add outreach prospects to a campaign
For directories that require outreach, choose Add prospects to a campaign. Select an existing campaign when its goal and approach fit, or create a new campaign from the session. Direct-submit listings can instead be exported and completed manually.
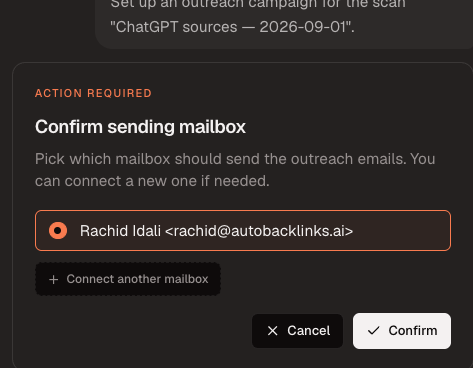
Confirm the mailbox that should send directory outreach. - 10
Choose your outreach approach
Write your own instructions or start from Custom approach, Paid placement, Backlink exchange, Free access, or Affiliate offer. Every template is editable, so add the exact offer, links, names, tone, and call to action the drafts should use. For example, choose Affiliate offer and add:
Offer a 30% recurring commission for every referred customer.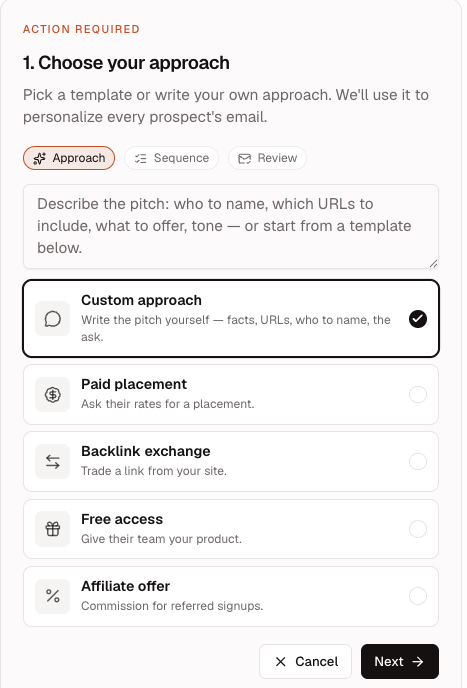
Choose a template or write your own approach, then edit the instructions with the details every draft should follow. - 11
Choose your email sequence
Choose 1, 2, or 3 emails and set the follow-up delay in days. The sequence applies to every selected prospect. A practical starting point is one initial email and one follow-up three days later.
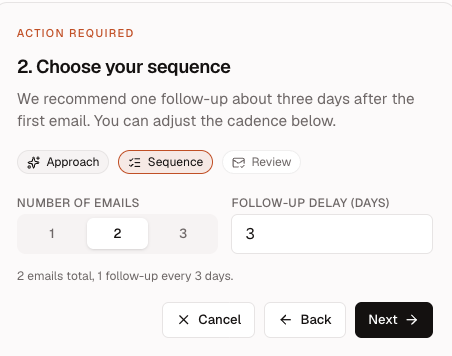
Set the number of emails and the delay before each follow-up. - 12
Review and generate the drafts
Review the approach, sequence, selected prospect count, and estimated credit use. The AI Agent generates drafts only for qualified prospects that have a verified, valid email address. Choose Generate emails when the summary is correct.
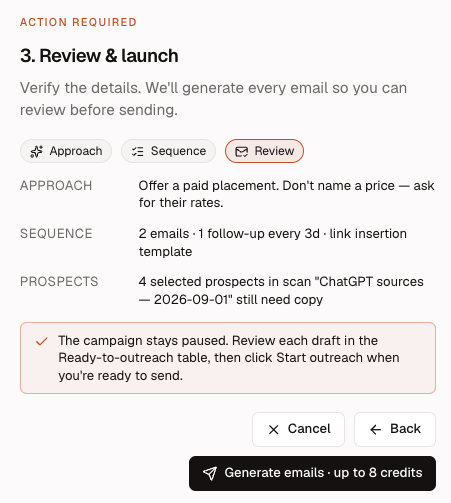
Confirm the shared instructions and eligible prospect count before generating emails. - 13
Review every generated draft
Open the Outreach Sequence table to check which prospects have ready drafts. Select a draft to read its subject, message, and follow-up before approving outreach. Exclude unsuitable prospects or revise the campaign instructions when the copy needs a different direction.
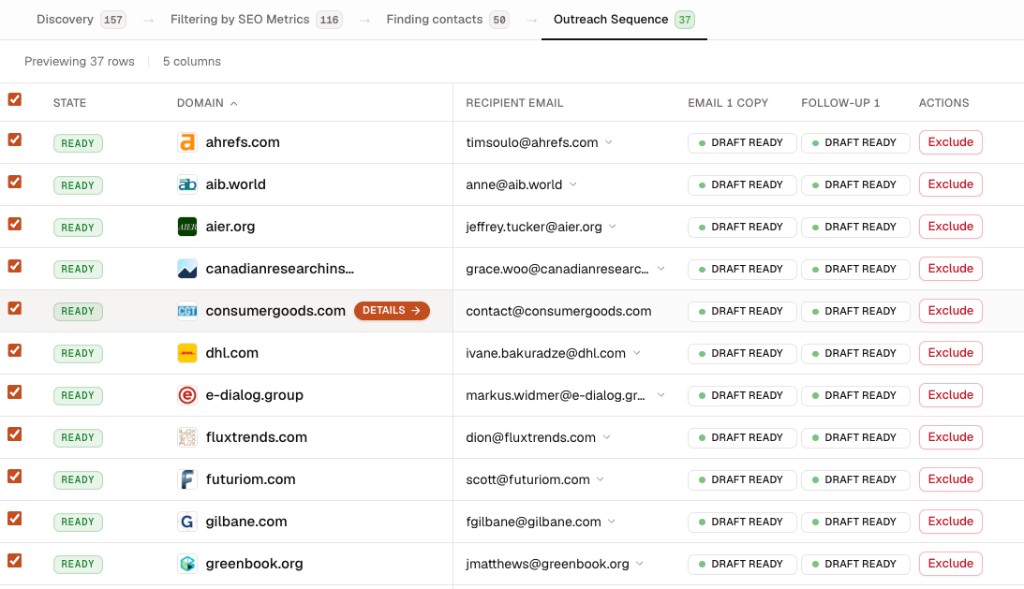
The Outreach Sequence table shows draft readiness for every eligible prospect. 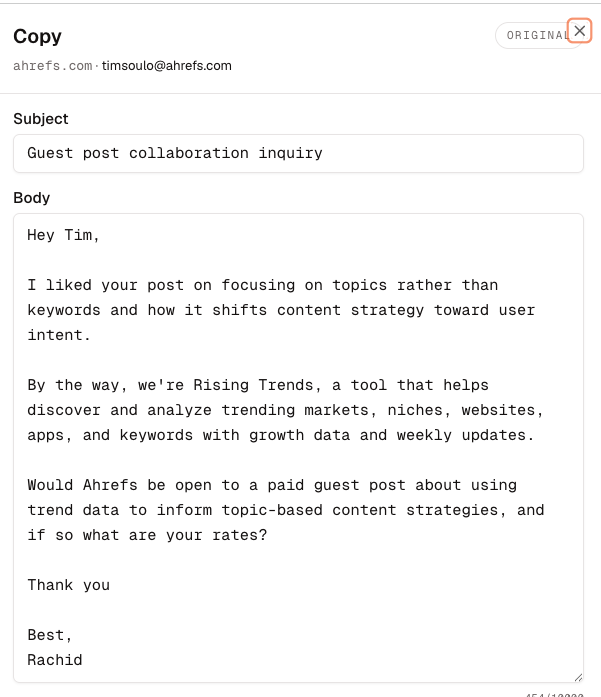
Open each draft to verify the recipient, subject, personalization, offer, and call to action. - 14
Review the submission or outreach request
For outreach-based listings, approve Start outreach only after checking the generated request. For direct submissions, verify your eligibility, the required business details, and whether the listing is free, paid, or membership-based before submitting.